Introduction
Owning a Toyota Prado 150 in Australia opens up incredible possibilities for family camping and outdoor adventures. When we first bought our Prado, my goal was to prepare it for camping trips and beach driving without spending a fortune on heavy modifications straight away.
Over time, through actual trips with our family of four, I learned which upgrades were genuinely useful, how to make the most of the Prado’s storage space, and how important it is to build your 4WD skills gradually.
This is not a professional 4WD training guide. It is simply what has worked for our family and the lessons I’ve learned from using our Prado for camping, beach driving, and light off-road adventures.
Here is my practical guide to setting up a Prado 150 for camping, managing roof storage, driving on sand, and progressing safely into 4WDing.
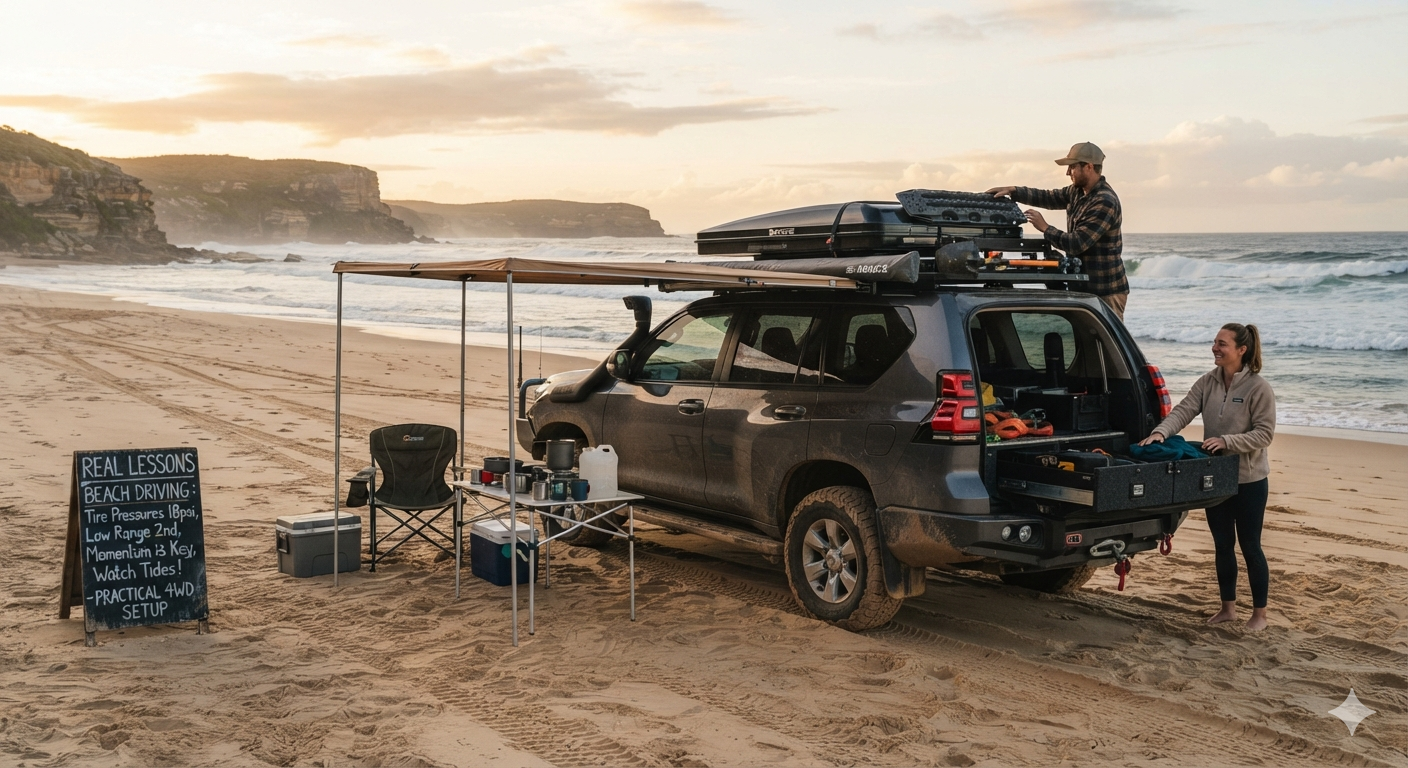
1. Roof Storage Setup: Rhino-Rack Platform & Waterproof Bag
Inside a 7-seat SUV, cabin space fills up surprisingly quickly when four family members, camping equipment, food, and clothes are packed into the vehicle.
One of my first camping upgrades was installing a Rhino-Rack Pioneer Platform, which cost around $1,500 AUD including professional installation, plus four matching eye bolts for around $50. (Note : prices may have increased since then)
The roof platform made a huge difference to our camping setup.
The 200L Waterproof Bag
At first, I wondered whether a 200L waterproof luggage bag would be too large.
It turned out to be one of the most useful additions to our setup.
We use it for bulky items such as:
- Family clothes
- Sleeping bags
- Camping chairs
- Other soft camping equipment
It also gives us valuable extra space inside the vehicle and has kept our gear dry during heavy rain on highway trips.
What We Carry on the Platform
Depending on the trip, our roof platform can carry some of our largest camping items, including:
- Coleman 8-person tent
- Dune 4WD gazebo
- Dune 4WD self-inflating queen mattress
- Waterproof luggage bag
However, one important lesson is to always check the maximum roof load and platform load ratings for your specific vehicle and rack setup.
Don’t assume that because something physically fits on the roof, it is safe to carry it there.
A Critical Lesson: Check Your Platform Bolts
This is probably the most important lesson I learned from our roof rack.
When you install the platform, you receive a tightening tool for the platform hardware. After securing everything, make sure the mounting hardware is properly tightened according to the manufacturer’s instructions.
I learned this the hard way.
After about a year of camping, I hadn’t checked the platform bolts properly. One day, while driving on the highway, I suddenly heard a loud and violent shaking vibration coming from the roof.
At first, I had no idea what was happening.
I was genuinely worried that something on the roof was about to come loose. The vibration continued, and I spent a very stressful couple of hours driving while trying to work out what was causing it.
Eventually, I discovered that the platform hardware had loosened.
Since then, I always keep the tightening tool inside the vehicle and periodically check the platform hardware, especially before longer trips.
Lesson learned: A roof rack is not a “fit and forget” accessory.
2. Beach Driving: Permits, Tyre Pressure & Sand Technique
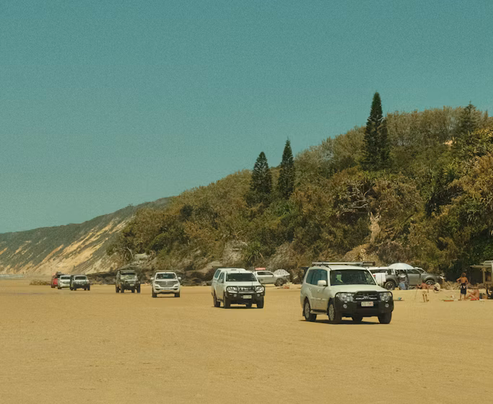
Beach driving is one of the best parts of owning a 4WD in Australia, but soft sand can be very different from normal road driving.
The vehicle needs to be prepared properly, and conditions can change quickly.
Check Your Beach Driving Permit
Many popular beach-driving destinations require a specific vehicle access permit.
Always check the requirements for the particular location before your trip. Different areas can have completely different permit systems, and a permit for one location does not automatically cover another.
For example, destinations such as Bribie Island and K’gari have their own access and permit requirements.
If you’re visiting regularly, an annual permit may provide better value than buying short-term access each time.
Air Down Before Driving on Soft Sand
Reducing tyre pressure is one of the most important techniques for beach driving.
Lower pressure increases the tyre’s contact patch and can help the vehicle travel over soft sand rather than digging into it.
However, there isn’t one universal PSI number that works for every vehicle.
Your appropriate pressure depends on factors such as:
- Tyre size and construction
- Vehicle weight
- Sand conditions
- Load in the vehicle
- Tyre manufacturer’s recommendations
I have personally used pressures around the 16–20 PSI range in suitable conditions, but this should not be treated as a universal recommendation.
Use designated air-down areas where available, carry a reliable tyre gauge, and make sure you have a way to inflate your tyres again before returning to normal roads.
Driving Technique on Sand
Beach driving takes some practice.
The vehicle can feel surprisingly unstable when travelling through soft sand or deep ruts.
A few things I’ve learned:
- Maintain smooth momentum rather than aggressive acceleration.
- Avoid sudden steering movements.
- Follow established tracks where appropriate.
- Keep an eye on changing sand conditions.
- Slow down around deep ruts and water.
- Make sure passengers, especially children, are properly seated and secured.
If a track has very deep ruts, don’t blindly follow the deepest section simply because previous vehicles have done so.
Assess the conditions and choose the safest line that your vehicle can realistically handle.
Don’t Panic If You Get Bogged
Getting stuck in sand can happen even to experienced drivers.
The most important thing is don’t keep spinning the wheels.
Spinning the tyres usually digs the vehicle deeper.
Stop, assess the situation, reduce tyre pressure if appropriate, and use suitable recovery equipment if you have it.
Recovery boards, a shovel, rated recovery points and appropriate recovery equipment can make a big difference.
Most importantly, never assume that another vehicle will be available to rescue you.
Beach conditions can change, and other drivers may not have the correct equipment—or may not be able to safely recover your vehicle.
Wash the Underbody After Beach Driving
This is another lesson I learned from experience.
After driving on the beach, a surprising amount of sand can remain underneath the vehicle, even after driving for hours on the highway.
Saltwater and sand are particularly hard on vehicles, so I always recommend giving the vehicle a thorough fresh-water wash after beach driving.
Pay particular attention to:
- Underbody
- Wheel arches
- Suspension components
- Chassis areas
- Wheels and brakes
Don’t assume that highway driving has removed all the sand.
3. Progressing Into 4WD: Start Easy & Upgrade Smart
When you first buy a 4WD, it’s tempting to start modifying it immediately.
Suspension lifts, bigger tyres, winches, recovery gear, snorkels and other accessories can quickly become expensive.
I’ve found that it makes more sense to learn the vehicle first and upgrade based on the type of driving you actually do.
Start With Easier Tracks
If you’re new to 4WDing, start with:
- Beach driving in suitable conditions
- Gravel roads
- Easy dirt tracks
- Well-maintained beginner-level 4WD tracks
This gives you an opportunity to understand how the Prado behaves on different surfaces before moving onto more difficult terrain.
Consider a Snorkel Based on Your Use
A snorkel can be useful for drivers who regularly travel in dusty environments or plan to tackle water crossings where the vehicle manufacturer’s specifications and local conditions allow it.
However, a snorkel doesn’t make a vehicle automatically safe for deep water.
Water crossings should always be approached carefully, and the vehicle’s wading limits, air intake position, electrical components, recovery options and local conditions all need to be considered.
For our type of family camping, I would prioritise driving skills and basic recovery equipment before expensive modifications.
When a Winch Makes Sense
A winch can be a valuable recovery tool if you regularly travel through remote or challenging terrain.
But for basic camping, beach driving and easier 4WD tracks, you don’t necessarily need to install one immediately.
If you eventually start tackling steep, muddy or remote mountain tracks, a properly installed winch, rated recovery points and appropriate recovery equipment can become an important part of your setup.
Likewise, a 2–2.5-inch suspension lift and more aggressive all-terrain or mud-terrain tyres may be useful for particular types of driving, but they are significant investments.
I’d rather upgrade gradually as my driving experience and the places I visit demand it.
Don’t Underestimate Remote Travel
For challenging or remote tracks, travelling with other vehicles is strongly recommended.
If something goes wrong, having another properly equipped vehicle can make a huge difference.
Before heading into remote terrain, think about:
- Recovery equipment
- Communication
- Weather conditions
- Fuel range
- Spare tyre
- Navigation
- Emergency supplies
- Recovery points
- The experience level of the drivers in your group
The more remote the track, the more important preparation becomes.
What I’ve Learned From Setting Up Our Prado 150
After several years of using our Prado for family camping and beach trips, my biggest lesson is that you don’t need to build an extreme 4WD to enjoy Australia.
For our family, the most useful upgrades have been the ones that solve real problems.
1. Storage Makes a Huge Difference
A roof platform and waterproof storage bag gave our family much more usable space without immediately moving to a larger vehicle.
2. Learn Before You Modify
It’s easy to spend thousands of dollars on 4WD accessories.
But you may discover that some modifications aren’t actually necessary for the type of driving you do.
3. Tyre Pressure Is More Important Than Many Beginners Realise
Understanding how tyre pressure affects sand driving is one of the most useful skills I’ve developed.
4. Recovery Preparation Matters
Don’t depend on someone else coming along to rescue you.
Carry appropriate equipment and, more importantly, know how to use it.
5. Check Your Equipment Regularly
The loose roof-platform bolts taught me an important lesson.
Installing equipment is only the beginning. Maintenance and regular inspections are just as important.
Conclusion
Setting up a 4WD for camping doesn’t mean buying every accessory on the market.
For our Toyota Prado 150, we started with practical storage, learned how to drive on sand, gradually improved our recovery preparation, and upgraded the vehicle based on our actual camping and 4WD needs.
The biggest improvement hasn’t necessarily been a new accessory. It’s been gaining experience and learning how to prepare properly for each trip.
If you’re thinking about turning your Prado 150—or another 4WD—into a family camping vehicle, my advice is simple:
Start with the basics, learn your vehicle, upgrade gradually, and spend more time exploring than shopping for accessories.
Australia has an incredible amount of coastline, bushland, national parks and 4WD tracks to explore.
And you don’t need the most heavily modified 4WD to enjoy them.
Leave a Reply